
A quick build shed is a prefabricated or kit-based structure you assemble on site in one to three weekends, faster than stick-framing from scratch but only if you choose the right material for your climate.
Watch for condensation: metal kits cost the least yet rust anything sitting directly on the floor in humid regions, while wood demands resealing every two to three years to keep framing from rotting.
Most kits center on a 10×12-foot footprint, about right for fitting a riding mower and workbench without triggering permit requirements in jurisdictions like Seattle that exempt single-story detached structures under 120 square feet.
Check for Permits Before You Cut Anything
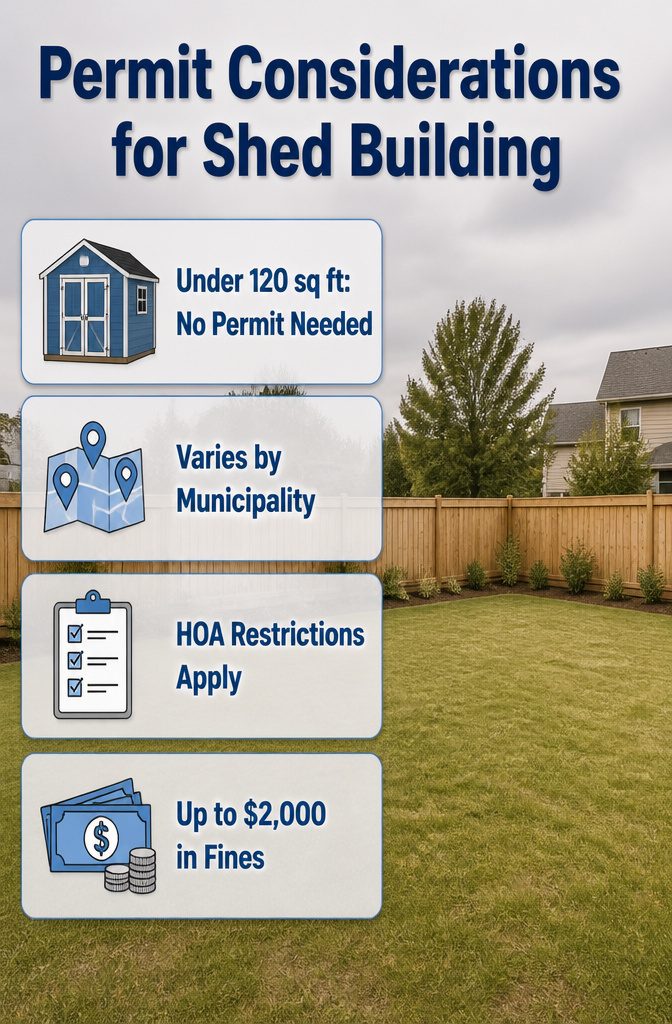
A shed under 120 square feet often clears the permit hurdle entirely, at least in municipalities that follow the same threshold Seattle uses for single-story, detached structures.
That is the size where many quick build shed kits land, so the math works in your favor, but the number is not universal.
Some towns draw the line lower, or add rules about setback from property lines and roof height, and a few require approval no matter how small the footprint.
I would never start cutting lumber before confirming where my own city falls on that spectrum.
A homeowner in Denver learned this the expensive way, racking up nearly $2,000 in fines over two years for an unpermitted build, then watching an inspector flag a second existing shed and force its complete relocation.
One skipped phone call multiplied into compliance headaches across multiple structures.
Homeowners’ associations add their own layer entirely, often restricting shed placement, roof color, or street visibility. Municipal rules and HOA rules run on separate tracks, and satisfying one does not mean you satisfy the other.
Checking both before ordering materials takes an afternoon. Rebuilding after a violation notice takes a weekend you will not get back.

【Enhanced Structural Integrity】Polar Aurora outdoor shed boasts a reinforced structure, methodically tested to facilitate a 29% easier and more stable assembly, aligning with practicality and durability.

【Advanced Frame Structure】Polar Aurora outdoor sheds utilize an improved full-frame construction. Fully tested to deliver an average of 30% improvement in ease of installation and overall stability, it is designed with your convenience in mind.
Size and Location
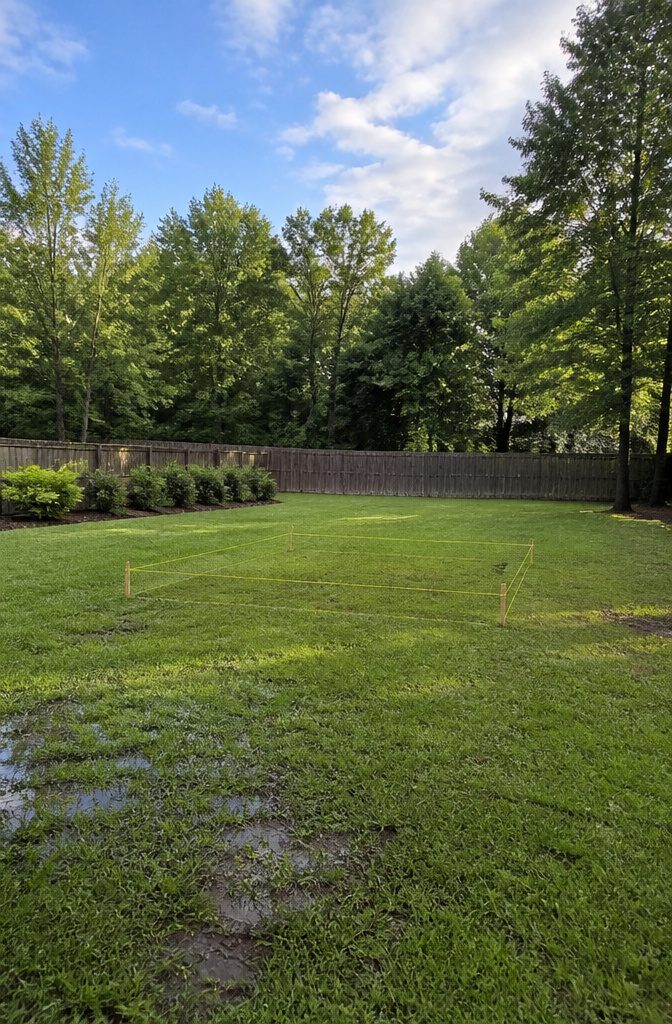
A 10×12-foot footprint is the size most quick build shed kits are designed around, and for good reason.
That span is large enough for a riding mower, a workbench, and shelving along one wall without feeling cramped, yet the joists and panels still come in lengths you can carry solo and cut with a standard circular saw.
Placement matters as much as dimensions, and drainage is the first filter.
I would walk the yard after a hard rain and watch where water pools. Any spot that holds water for more than a few hours will rot the floor in a few seasons, even with pressure-treated lumber.
A slight slope away from the shed base fixes this, and I would leave a few feet clear on all sides for access and maintenance.
Setback rules vary by municipality, sometimes to the property line, sometimes to a fence, and the distances differ county to county.
Most planning departments list their requirements under "Outbuildings" or "Zoning Ordinances" online, and many counties now overlay parcel lines on GIS maps so you can measure before you call.
Sun exposure decides what you can store.
Direct afternoon sun through a summer turns a shed into an oven, which rules out paint, propane, or anything heat-sensitive. I would orient the door away from prevailing winter wind too; wrestling a snowblower through a gale gets old fast.

Package Includes: you will receive 1 piece of outdoor storage shed floor mat, each measures approx. 6 x 4 ft/ 183 x 122 cm, which can not only protect the outdoor storage shed from being eroded by damp ground, but also help keep your outdoor storage shed clean, bringing much convenience to you

【High Quality Material】Outdoor shed floor mat is made of high-quality felt material, which has excellent water and oil absorption functions. Bottom is a sturdy and wear-resistant waterproof PE backing, providing anti-seepage protection. Providing protection for valuable equipment and shed floors to prevent rusting. Ensure that storage space is in a dry state for a long time

【Upgraded 25% Thicker for Heavy-Duty Protection】 At 2.5mm thick, this shed floor mat is 25% thicker than standard pads, providing superior cushioning and durability to protect your outdoor storage shed floor from heavy tools and equipment.
Build a Foundation That Matches Your Ground

A gravel base costs the least for a quick build shed, but only if you compact it in layers with a rented plate compactor.
Skip that step and the subgrade cracks within a year, sinking corners that throw the walls out of square. I would rather spend the rental fee now than rebuild the thing later.
Concrete slab runs higher upfront and takes more weekend hours, yet it is what I would choose for any shed holding metal tools long-term. The moisture protection pays back over time, especially in humid climates where corrosion eats unprotected steel.
Pile foundations become necessary on sloped ground or anywhere the frost line runs deep.
In colder states, the foundation must sit below that frost line or freeze-thaw cycles displace the whole structure within a few winters. Local building departments keep the exact depth for your area; a phone call beats a cracked slab.
Leveling matters more than the material you pick. A laser level or even a taut string line, checked before the first stake goes in, keeps the assembly from running crooked.
I have seen sheds where the door gap widened by an inch from one corner to the next because someone trusted their eye instead of the line.

【Reinforced Structure & Weather-Resistant Durability】Polar Aurora's 10x14 FT outdoor metal shed features a reinforced structure that has been methodically tested to allow 29% easier and more stable assembly, combining practicality with durability. Crafted from superior, resilient metal, it provides robust weatherproof protection with waterproof and UV-resistant properties, ready to withstand the elements.

Spacious Storage: Designed as a storage shed large enough for bulky items, the 10x12 FT layout accommodates lawn equipment, bikes, patio furniture, or seasonal decor. Its design doubles as a workshop or pet shelter.

plans, patterns, designs, kits, garden, garage, projects, diagrams, wood, blueprints, sheds, storage, outdoor, woodworking, shed, myshedplans
Frame the Walls on the Ground First
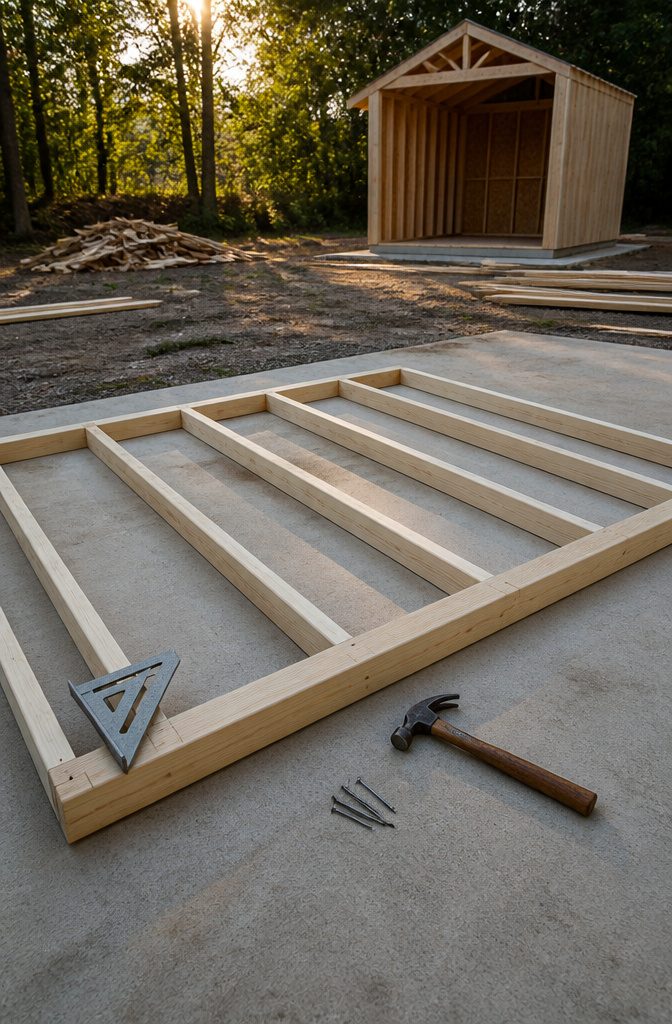
Wall frames go together faster and squarer on the ground than they ever will standing up. I lay the bottom plate first, then the top plate parallel to it, and run studs between them at roughly 16 inches on center.
A speed square at every corner keeps the assembly honest before a single nail goes in. The framing nail gun makes quick work of it, though I still check for square one more time before the sheathing goes on.
Sheathing the wall while it is flat is the move that saves the afternoon.
Nailing panels on the ground is easier on the arms and the accuracy both; the Z-shaped waterproofing strips at the horizontal joints go in clean without a ladder or a reach.
One trade-off to remember: a fully sheathed wall gets heavy fast.
I would build a long back wall in two pieces rather than fight a single 16-foot panel into place, especially if it needs to slide up against a house where there is no room to swing it.
Temporary bracing leans against the frame the moment it stands, before the wind or a bumped shoulder can knock it out of plumb.
Two diagonals, top and bottom, held with a couple of screws each, give enough stability to walk away and build the next wall the same way.

[Universal Fit for Multiple Pipes]: Manually open the drain cover to fit 4" SCH 40, 4" SDR 35, 4" corrugated pipe. This drainage grate cover offers unmatched versatility—no other drainage grate or yard sewage pump emitter provides such robust compatibility [Patent Pending]
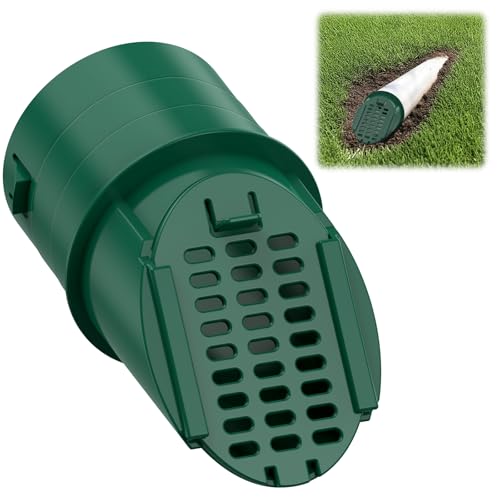
[Universal Fit for Multiple Pipes]: Manually open the drain cover to fit 4" SCH 40, 4" SDR 35, 4" corrugated pipe. This drainage grate cover offers unmatched versatility—no other drainage grate or yard sewage pump emitter provides such robust compatibility [Patent Pending]

Enhance your outdoor spaces with our Solid Durable Ground Grid. Crafted from high-quality HDPE material, these Gravel Grids offer excellent tensile strength and are supersonically welded for long-lasting performance. Ideal for driveways on both slopes and flat surfaces, they provide stability and support to keep gravel in place, ensuring a neat and organized appearance.
Install Exterior Panels Before Raising Walls

Attach the siding while the wall frame is still flat on the ground.
Nailing panels horizontally, at waist height, takes about half the time per sheet compared to working overhead on a ladder against a standing wall. The seams line up cleaner, the fasteners go in straighter, and you are not fighting gravity.
Z-shaped waterproofing strips at the horizontal joints block rainwater from seeping behind the panels during heavy storms. Installing these strips now, with the wall face-up, takes a few minutes per joint rather than the awkward reach-around required later.
This step is what separates a quick build shed from a weekend that stretches into two.
Once the panels are on, two people can tilt the wall up and brace it in under ten minutes. Skip this sequence and you add hours of ladder work for a result that looks less finished.

【Ample Storage Space】The interior offers generous space (192.91"D × 117.32"W × 81.1"H) for storing bicycles, inflatable paddleboards, lawnmowers, gardening tools, children’s toy cars and more. The garden shed can also serve as a fully-equipped small workshop to meet DIY or gardening needs.

【Multifunctional Design with Ventilation & Sloped Roof】This 10x12 FT outdoor storage shed is equipped with 4 air vents to promote steady airflow, keeping the interior environment fresh. The sloped roof design effectively sheds rainwater and snow, providing reliable protection for your belongings while blending into your garden landscape.

【Superior Frame Upgrade】AirWire outdoor shed features an upgraded full-frame structure, rigorously tested over 500+ times, boasting an average 30% improvement in installation ease and stability—engineered for your convenience.
Roofing Material and Installation
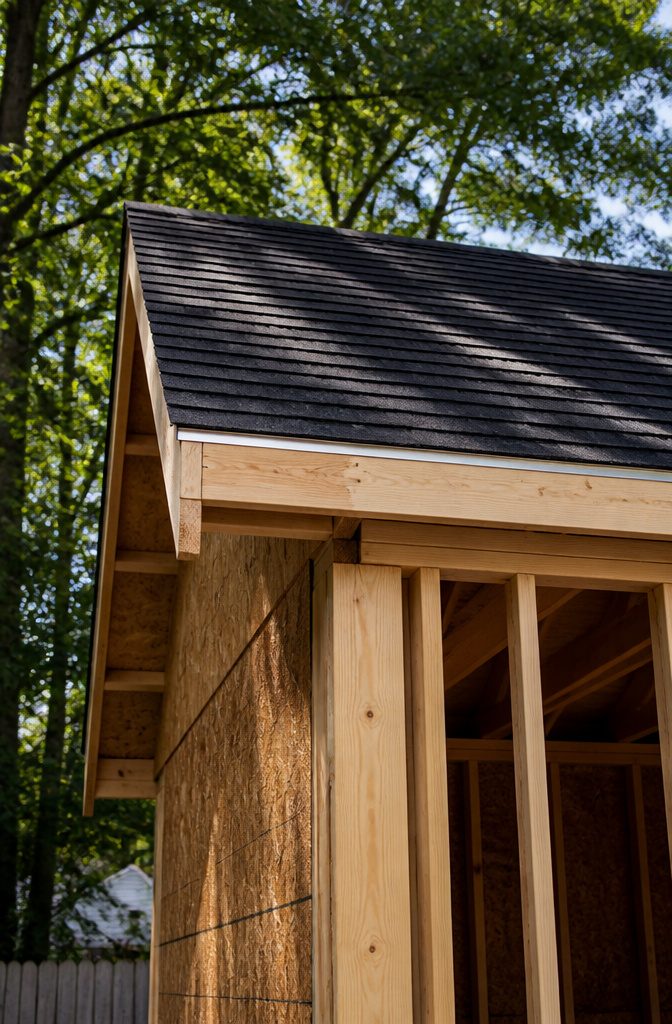
Asphalt shingles are the quickest roofing choice for a first-time shed builder because the process mirrors a standard residential roof: felt paper over OSB, then shingles and flashing.
I would pick them for any build where weather-tight by Sunday evening matters most.
Metal roofing installs faster once you are comfortable with the cuts and the ridge cap details, but the upfront cost runs higher and the learning curve can eat your time savings if this is your first roof.
Either way, this stage rewards patience more than speed. The eaves need proper overhang, usually built with scrap pickets or short boards to block critters from the gap between rafter tail and wall.
Flashing at the eaves and a bead of exterior-grade sealant around every joint take an afternoon but prevent the leaks that ruin tools or framing within a season.
A roof that sheds water is what makes the shed usable; everything beneath it is just storage that happens to be dry.

SHED FLOOR KIT: Install this steel frame floor kit after the shed has been assembled to create space between the ground and your shed floor and keeps stored items off the ground
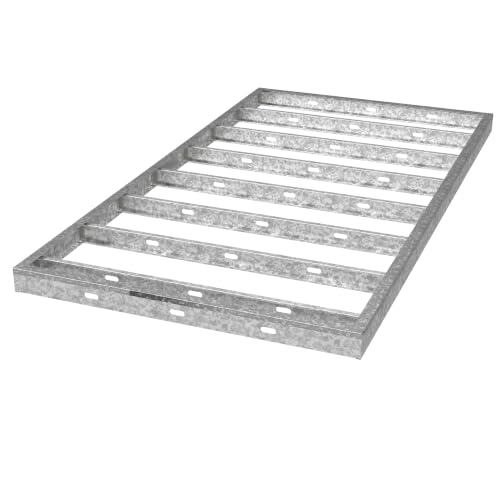
PERFECT FIT: Designed specifically for all Lifetime 8 ft. x 15 ft. sheds, ensuring a secure and stable foundation.

【Spacious Storage】This outdoor metal shed offers ample storage for tools,lawn mowers,bicycles,BBQ grills,and more.Its large capacity keeps your yard tidy and meets diverse needs,even doubling as a pet shelter or greenhouse.Stay organized effortlessly.
Doors, Windows and Pre-Installed Options
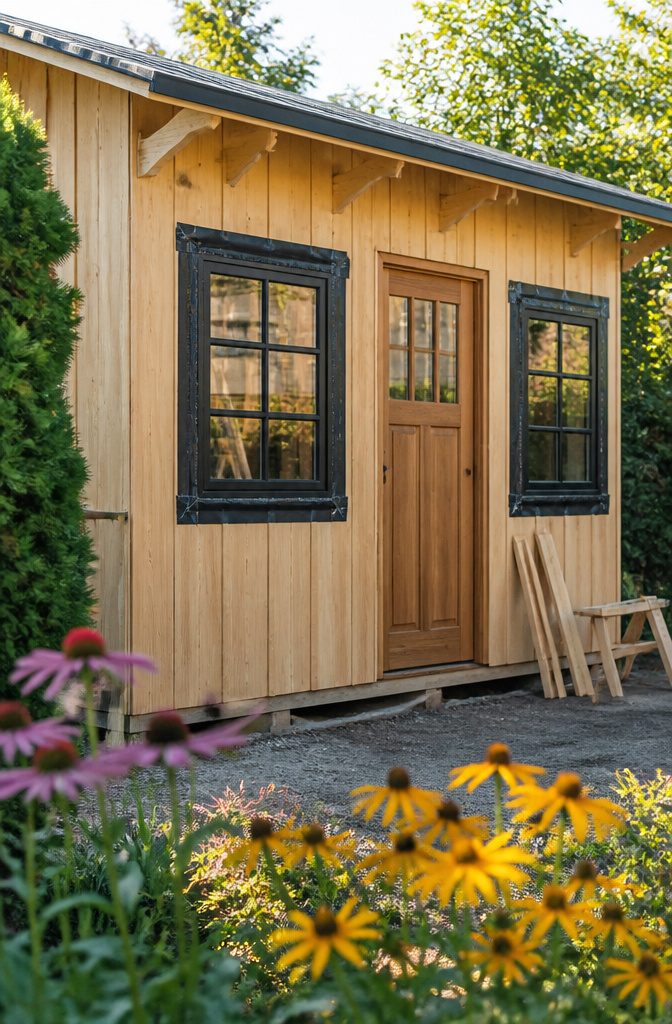
Pre-hung doors and windows are where a quick build shed stops looking like a box and starts feeling like a room that happens to sit in the yard.
The frame arrives square and already hinged, so the only critical step is getting the rough opening right.
Match the lintel span to the door width and support both sides with auxiliary posts, or the wall above will sag within a season.
I would spend the extra on an exterior-grade door with weatherstripping and outdoor hinges; an interior door painted to look tough will swell and jam after one wet winter, and replacing it costs more than the upgrade ever did.
Windows follow the same framing logic: lintel above, sill plate below. Before trim goes on, run waterproof tape around the frame and tuck it under the wall’s vapor barrier.
That seam is where rainwater sneaks behind sheathing and rots the studs, and it takes about as long to seal properly as it does to skip it.
A bead of exterior sealant at every joint, plus flashing at the eaves, blocks the leak path that ruins most sheds. The whole weatherproofing pass adds one afternoon and buys years of dry framing.

Waterproof Backing and Absorbent Top: the felt surface helps collect moisture, mud, dust and light drips from shoes, tools and stored equipment, while the PE backing forms a waterproof barrier between the mat and the floor below; This layered structure is suited to outdoor storage areas where damp ground, rainy weather and routine yard work can carry debris indoors; Use it to help keep shed, garage and carport floors cleaner during seasonal storage and daily access

Set includes 8 47.5 x 28 inch corrugated galvanized steel roof panels

【Package Includes:】You will get 6 x 4 ft storage shed mat 2MM Thickened, Which can not only prevent the storage shed floor from being eroded by damp ground, wear or tear, but also help keep your shed clean and tidy, effectively saving your cleaning time.
Interior Finishing That Earns Its Space
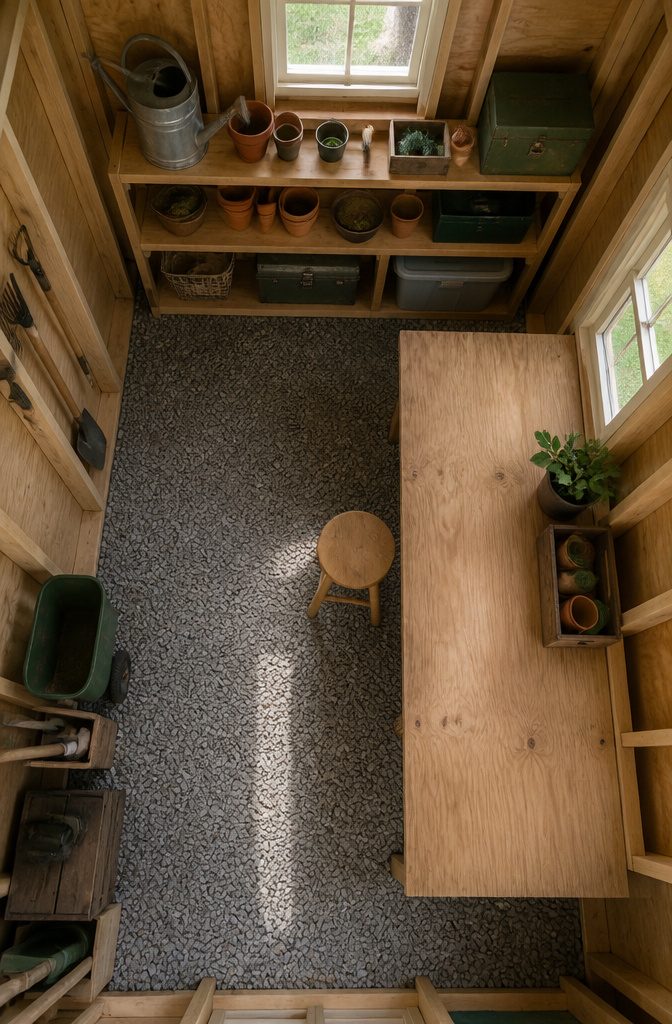
Wall-mounted shelves keep tools off gravel or dirt floors where rust starts, and that single choice turns a storage box into something you actually want to enter.
I would add a basic workbench next, nothing more than a plywood top on 2×4 legs screwed to the wall studs. It gives you a place to set a toolbox or pot seedlings without committing the whole floor area.
Hooks matter more than most people expect.
The peg strips that mount flush, no furring strips or bump-out hardware needed, save you an hour of fussing and hold rakes, cords, and the half-dozen things that otherwise end up in a corner.
Skip the built-in loft unless you already know what goes up there. A weekend build does not need custom carpentry to store items you forgot you owned.
Moisture barriers and insulation are useful if you will spend time inside, but for pure storage they are a project for year two.
The same goes for wiring. GFCIs are required by code, buried cable needs 12 to 24 inches of depth in conduit, and a grounding rod at the shed is standard.
I would hire an electrician for any of it; the wrong wire gauge or a shallow groove voids insurance and risks fire. Keep the shed functional first, powered second.

【Sturdy and Corrosion-resistant】: The angled slope drainage pipe is made of high-quality PVC hard pipe, which is strong, heat-resistant, not easy to crack, and can be used for a long time

Light material, wear resistance, stable chemical performance, light resistance, aging resistance, acid and alkali resistance. Suitable for different soil and desert geological conditions.

Light material, wear resistance, stable chemical performance, light resistance, aging resistance, acid and alkali resistance. Suitable for different soil and desert geological conditions.
Wood, Plastic or Metal Kits

Wood kits run mid-range in cost and reward hands-on time: you can paint or stain them any color, add a window later, or match the trim to your house.
That freedom costs you in upkeep. Reapplying sealant every two to three years is non-negotiable if you want the walls to last, and you will need to inspect roof seams each spring for leaks before they rot the framing.
Plastic sheds skip almost all of that. The color you pick at checkout is the color you keep, which limits curb-appeal tweaks, but the trade is near-zero maintenance and solid weather resistance.
For a weekend build you never want to touch again, this is the material I would pick.
Metal is usually the cheapest way to cover the footprint, and it is strong and secure against anything short of power tools.
The downside is condensation. In humid climates, anything stored directly on the floor will rust faster unless you raise it off the gravel or add a vapor barrier.
| Wood | Plastic | Metal | |
|---|---|---|---|
| Cost | Mid-range | Mid to high | Usually lowest |
| Maintenance | Sealant every 2–3 years; annual roof check | Minimal | Check for condensation; raise items off floor |
| Durability | Good with upkeep | Excellent weather resistance | Strong; rust risk inside |
| Customization | Paintable, cuttable, expandable | Limited colors; no structural changes | Minimal |
For a quick build shed on a real budget, metal wins on price if you are storing lawn equipment that can handle moisture.
Wood wins if the shed sits where you see it daily and you want it to look like part of the house.

Fits Arrow and Storboss 10' by 12', 10' by 13' and 10' by 14' buildings (not compatible with buildings with swing doors)

QUALITY: Designed for style and built to enhance your outdoor space with lasting appeal.
What the Build Actually Costs

A quick build shed runs about $3,500 on average, with most projects landing between $1,800 and $9,000 depending on size and how finished you want it.
Material costs have climbed in recent years, so the low end of that range is tighter than it used to be.
The money breaks down across five areas. Foundation comes first: gravel is cheapest, concrete slabs add more.
The walls eat the next chunk, whether you buy a pre-cut kit or frame from raw lumber. Roofing follows, then hardware like hinges, latches, and fasteners.
Finishing is where budgets split. Paint, shelving, and trim can double the spend if you let them, or you can leave the interior bare and call it done.
I would put my dollars into the structure itself and skimp on cosmetics. A dry, square shed with a solid roof beats a pretty one that leaks in two seasons.
If the kit price has jumped since last year, buying the lumber yourself and cutting on site still wins on cost, though it costs you Saturday hours you might not have.

Spacious Storage: Our 7x5ft outdoor storage shed features an external dimensions of 85.8''L*59.8''W*72.4''H, and door sized 61.4''L*55.9''W; Ideal for storing items such as snow blowers, umbrellas, bicycles, skateboards, trash bins, and gardening tools

Spacious Storage Shed: Our outdoor metal shed features plenty of inner storage space so that you can store garden tools, lawn care equipment, and pool supplies. Lockable double doors to secure items (lock is excluded).

【Spacious Storage】This outdoor metal shed offers ample storage for tools,lawn mowers,bicycles,BBQ grills,and more.Its large capacity keeps your yard tidy and meets diverse needs,even doubling as a pet shelter or greenhouse.Stay organized effortlessly.
How Long This Really Takes

A basic shed, built from scratch by one or two people who know their way around a miter saw, usually eats up one to three weekends.
Scale that up to an 8×10 storage shed and you are looking at two to four full weekends of actual build time.
First-timers should add a buffer. Reading plans twice, walking back to the truck for the blade you forgot, and recutting a board that measured 71 inches instead of 72: those moments add hours that experienced builders simply do not spend.
For a beginner, the same 8×10 build drifts closer to four to six weekends once permits and material runs are factored in.
Pre-cut kits change the math entirely.
Factory-fixed panel dimensions kill the error-prone steps: joist spacing is already right, support blocks line up without thought. What takes a full weekend of framing from scratch collapses to a few hours of assembly.
I would go kit every time speed matters more than custom sizing. You do lose the exact depth or window placement you pictured, but you gain a Saturday back.
Maintenance That Extends the Life

A quick build shed only stays quick if you keep the maintenance short, too. Wood siding needs repainting or restaining every two to three years, especially around the base where rain splash hits hardest.
I would check roof seams and door gaskets each spring; catching a minor leak early keeps the framing from rotting in a single season.
Plastic sheds wash clean with a hose and mild soap, no sealant required.
Metal means checking for rust at scratches and watching for condensation damage on tools stored inside. Gravel floors let humidity rise straight up off the ground, so raising stored items even a few inches slows rust more than you’d expect.
Gutters collect debris fast on a small roof, and clogged channels back water into corners. Door hardware needs lubrication yearly; outdoor-grade hinges and weatherstripping cost more upfront but keep doors from swelling and jamming after a winter of rain.
Reseal around windows whenever you spot gaps in the caulk or tape, since leaky windows rot surrounding framing within a few seasons.
Frequently Asked Questions
Do I need a permit to build a shed?
You probably need one if the shed exceeds 120 square feet, but the threshold varies by city.
Some municipalities also enforce setbacks from property lines and height limits, and a few require approval for any detached structure. Check with both your city planning department and your homeowners’ association before ordering materials.
How long does it take to build a shed?
An experienced builder can finish a basic shed in one to three weekends, while an 8×10 build typically runs two to four weekends.
First-timers should budget four to six weekends once permits, material runs, and learning-curve mistakes are included. Pre-cut kits collapse that framing time to a few hours and are worth the trade-off when speed matters.
What materials do I need to build a shed?
Most quick build sheds use wood, plastic, or metal.
Wood allows paint and customization but needs sealant every 2–3 years. Plastic is nearly maintenance-free with limited color choices.
Metal is the cheapest and strongest, though condensation can rust unprotected tools on the floor. Expect to spend on foundation, walls, roofing, hardware, and any interior finishing you add.
How to build a storage shed cheaply?
Put your money into the structure and skip cosmetics initially. A gravel foundation costs less than concrete, and buying raw lumber yourself beats many kit prices even if it burns more Saturday hours.
Metal sheds usually run lowest on total cost, especially for lawn equipment that tolerates humidity. Leave insulation, wiring, and built-in lofts for year two.
Will a shed raise your property taxes?
Tax rules vary by county and state, so contact your local assessor’s office for guidance on whether a shed of your planned size triggers a reassessment.
Can you build a shed out of 2×2?
A quick build shed kit also arrives with factory-set panel dimensions that bypass the need to size your own studs.
Are metal or wood sheds better?
Metal wins on price and security if you are storing lawn gear and can handle occasional condensation.
Wood wins on appearance and the ability to paint, stain, or add windows later, but only if you commit to resealing every 2–3 years and inspecting roof seams annually.
Plastic splits the difference with minimal upkeep and solid weather resistance, though you cannot change the color after purchase.