I’ve learned the hard way that pressure-treated plywood is your best bet for most sheds, specifically 3/4″ tongue-and-groove. This type locks together tighter than square-edge boards and won’t flex under your lawnmower. For serious weight like tractors, consider doubling up with two layers of 5/8″ or adding blocking between joists spaced 16 inches apart; never use 24-inch spacing. Concrete is a strong option if you’re prepared to invest $800 to $1,500. However, gravel bases with 4×4 skids are effective when you elevate everything a minimum of six inches. Proper ventilation underneath is essential to prevent rot. I neglected this step once, and the mold served as a harsh lesson. Seal fresh cuts with copper naphthenate and apply two coats of epoxy to create a durable floor that can withstand heavy loads. It’s important to match materials to your specific climate and load requirements before cutting any boards.
Do You Actually Need a Shed Floor?
Whether you’re building from scratch or considering a pre-built kit, it’s essential to evaluate the necessity of a floor in your shed. Experience shows that bare ground can lead to issues like instability, rot, and damage to your belongings.
Here’s what “floor” actually means:
- Finished surface — what you walk on
- Foundational base — what everything rests upon
For most projects, you’ll want both. A proper floor provides stability, especially if you’re storing heavy equipment or working inside regularly. Without adequate support underneath, sheds can warp and doors can jam.
Moisture durability is crucial. Even dry ground retains dampness that can creep up, causing mold and rust. A solid foundation—such as concrete, gravel, or pressure-treated framing—prevents this, significantly extending the life of your shed.
Pre-built kits come with manufacturer specifications, while custom builds require careful planning. Skipping the floor may save money initially, but it can lead to greater expenses down the line.
What Goes Under Your Shed Floor? Base Options Compared
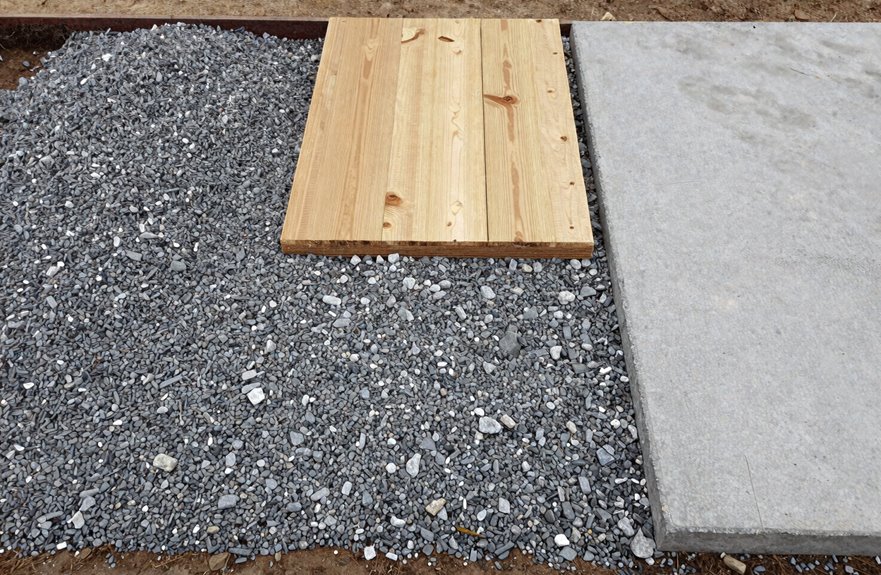
Why does the base beneath your shed floor matter so much? A poor foundation can turn your shed into a wobbly, rotting mess within three years.
A poor foundation can turn your shed into a wobbly, rotting mess within three years.
Your three main options:
- Gravel foundation – This is my preferred choice for wooden sheds. It costs about $200-400 for a 10×12 shed, improves drainage significantly, and simplifies moisture control. I lay 4-6 inches of compacted gravel, and it works effectively.
- Concrete pad – This is the most durable option. Expect to spend $800-1,500; your floor won’t shift at all. I poured one in 2019 and have no regrets, although relocating that shed is now impossible.
- Pressure-treated runners on bare ground – This option is only for those in a pinch. I tried it once and will not do so again due to the risk of rot.
The non-negotiable: Elevate everything 6+ inches with ventilation underneath. Neglecting this invites mold growth.
How to Choose Shed Flooring: 4 Decisions That Matter
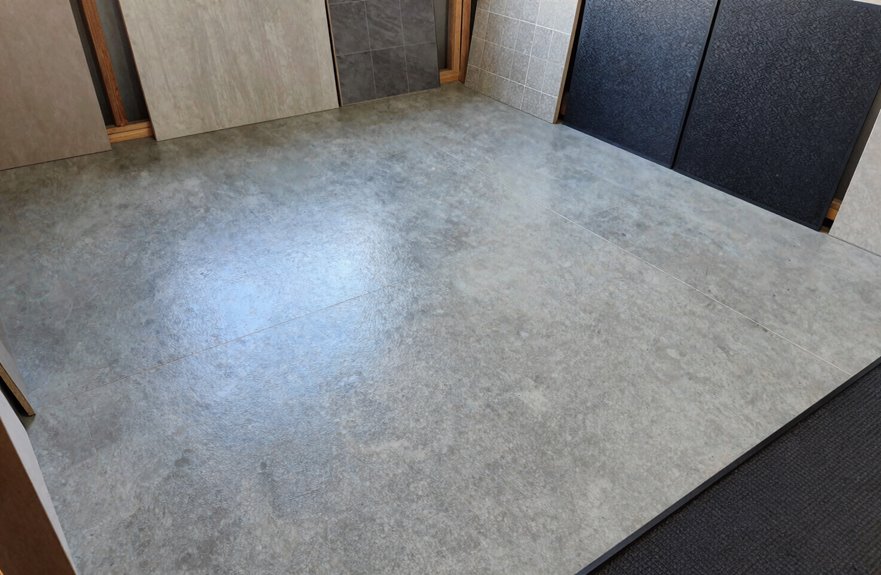
Choosing shed flooring requires more consideration than simply opting for the cheapest option at the lumber yard. You need to consider three main factors: the weight of the items you plan to store, the level of moisture in your climate, and your willingness to tackle a complicated installation versus a simpler approach. Let’s explore these factors to help you make an informed decision.
Weight Capacity Needs
How much weight can your shed floor handle before it starts to groan, sag, or give out entirely? I’ve learned this the hard way.
Understanding Your Load
Your joist spacing and material choice determine everything. Standard 2×6 joists handle about 53 pounds per linear foot, but heavier storage requires 2×8s with tighter spacing. I once skimped here and ended up with a warped floor.
Boosting Strength
For serious load capacity, double up your plywood flooring; ⅝ inch layers work, or upgrade to ¾ inch tongue-and-groove. These lock together, distributing weight evenly across joists.
The Nuclear Option
A concrete slab offers maximum capacity and zero movement, although it is a permanent solution. It may be excessive for most, but it is reassuring if you’re parking equipment inside.
Don’t forget pressure-treated runners underneath; proper support prevents sagging that I ignored until it was too late.
Moisture Resistance Priority
Moisture Resistance Priority
Where does moisture rank on your priority list? If you’re in a damp climate like I am, it likely ranks high. I’ve learned that lesson through experience.
Moisture Resistance Basics
Moisture resistance determines whether floors last decades or rot in five years. I’ve witnessed the consequences: skipped prep, soggy ground, and ruined lumber.
Your Best Options
- Pressure-treated plywood – This is my preferred choice for wooden sheds. The chemicals effectively resist rot, even during humidity spikes.
- Concrete slabs – These offer excellent moisture resistance if you can afford the pour. I couldn’t on my first shed, but it would have been beneficial.
Don’t Skip the Finish
Waterproof finishes are crucial. I coat my plywood with epoxy sealant—two layers, following the grain. It’s a meticulous process, but it prevents mold.
Pro tip: Elevate your shed by a minimum of six inches. I used 4×4 skids on concrete piers. Your future self will appreciate this choice.
Installation Complexity Level
Because I nearly threw out my back trying to install concrete forms by myself, I now weigh installation complexity before buying any flooring material. Your weekend is valuable.
Here’s what you’re really signing up for:
| Material | Installation Complexity | Best For |
|---|---|---|
| ⅝” square-edge plywood | Easy – just lay and screw | Standard storage, light tools |
| ¾” tongue-and-groove | Moderate – interlocking edges | Higher load capacity, heavier gear |
| Double ⅝” plywood | Moderate-Hard – precise layering | Maximum load capacity, tractors |
| OSB | Easy – cuts like plywood | Tight budgets, dry climates only |
| Concrete slab | Hard – forms, pour, cure | Permanent, moisture-proof foundation |
Plywood thickness directly affects your timeline. Thicker tongue-and-groove takes longer but prevents sagging. Saving two hours on installation often leads to days spent fixing bounce and creaks. Choose wisely to ensure a lasting build.
Concrete Shed Floors: Most Durable, Least Flexible
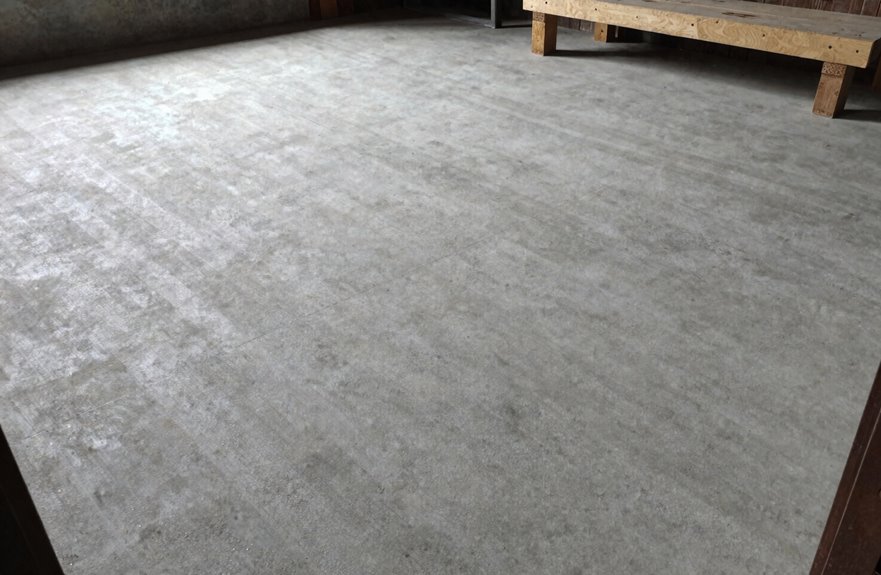
Why do I keep returning to concrete when helping friends plan their sheds? Its durability is unmatched. I know this from experience, having replaced too many rotted floors.
Concrete shed floors provide excellent strength and moisture resistance. A 4-inch slab meets most residential needs, though I recommend 6–8 inches for heavy equipment. The single slab serves as both foundation and floor, providing rigid, immovable support.
However, flexibility is lost entirely. You commit to that location permanently; relocating requires demolition. Additionally, concrete does not perform well against frost heave, and standing on it for long periods can be hard on your joints.
I understand these limitations. For permanent workshops that will store significant weight, concrete remains the best option.
Pressure-Treated Plywood: Best Balance of Price and Performance
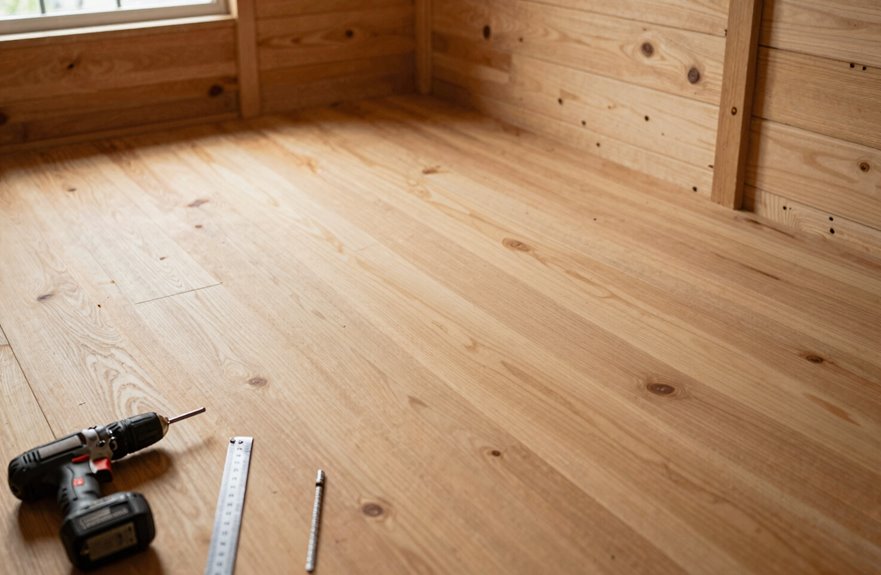
I learned the hard way that pressure-treated plywood is ideal for most shed builds. The chemical treatment, usually ACQ or CA, which are copper-based preservatives, effectively fights rot better than regular plywood. This means your floor won’t deteriorate after a few rainy seasons. I’ve seen untreated plywood fail in under two years, leading to unnecessary waste. For proper load capacity, you should use ⅝” to ¾” thickness, which can support your lawnmower, tool chest, and that heavy bag of concrete you forgot about without sagging or cracking. Installation is straightforward: cut it with a circular saw, screw it down every 8 inches on the joists, and then you can apply paint, vinyl, or whatever finish suits your style. No special tools or concrete curing time are needed, making the process efficient.
Moisture Resistance Benefits
How does pressure-treated plywood hold up when the ground gets soggy? I’ve learned that PT plywood offers moisture resistance that outperforms OSB and untreated plywood, making it my go-to choice for shed flooring that won’t rot.
The preservative treatment penetrates deep into the wood fibers, creating a barrier against decay when humidity increases. Water still plays a role, but PT plywood provides additional time before issues arise, especially in rainy climates or areas with persistent ground dampness.
Here are some key points about rot prevention:
- Elevate your frame at least 6 inches off grade to double the lifespan.
- Install vents every 24 inches along opposing walls for airflow that prevents mold.
- Seal cut edges with copper naphthenate since the treatment doesn’t reach fresh cuts.
I skipped step three once; don’t make the same mistake.
Load Capacity Strength
The sweet spot for most shed builds comes down to what you’re actually putting inside, and pressure-treated plywood hits that mark without emptying your wallet.
Durability starts with choosing the right floor thickness. Here’s what actually works:
| Thickness | Load Capacity | Best For |
|---|---|---|
| 5/8 inch | Moderate | Light tools, seasonal items |
| 3/4 inch | Mid-to-heavy | Lawn equipment, workbenches |
| Double 5/8 | Heavy | Engine blocks, dense storage |
| 3/4 + blocking | Maximum | Full workshops, machinery |
I once used 5/8 inch for a motorcycle, and the flex was frustrating. I upgraded to 3/4 inch pressure-treated plywood, and that resolved the issue.
The treatment process adds strength against moisture, which protects load capacity long-term. For most of us storing typical shed items—mowers, bikes, holiday bins—3/4 inch provides a solid balance of strength and cost.
Installation Versatility
Once you’ve sorted out thickness and load ratings, you’ll want to think about how the material behaves while you’re building. I’ve learned that pressure-treated plywood excels in this area because you don’t need fancy tools or extensive carpentry skills to get it right. It cuts cleanly, screws down tightly, and accommodates minor measuring errors.
Moisture resistance is significant. You’re not battling swelling boards mid-project, which can be frustrating.
Here are its key installation advantages:
- It spans standard 16-inch floor joists without sagging, even with less-than-perfect framing skills.
- You can cut notches for utilities without the entire sheet crumbling.
- It handles wet weather better than OSB, so you’re not racing against rain clouds.
OSB Flooring: When It Works (and When It Doesn’t)
If you’re trying to keep costs down on your shed build, OSB (oriented strand board) is likely already on your radar for good reason. OSB flooring saves money upfront compared to plywood or concrete, allowing you to join the ranks of DIY builders who have successfully managed tight budgets.
However, moisture resistance is a concern. OSB absorbs water easily, and I’ve seen edges swell and weaken after just one season in damp climates. Proper moisture barriers underneath and frequent inspections for damage are essential.
Floor durability is also a consideration for heavy loads. Without tongue-and-groove edges, panels can separate slightly, leading to uneven spots. Consider this when storing lawnmowers and bicycles, but not tractors.
For better performance, add reinforcement with extra joists or blocking. OSB can be effective for large, odd-sized sheds on tight budgets, but vigilance regarding water protection is crucial.
How Thick Should Your Shed Floor Be?
I learned that floor thickness is influenced by three key factors: the weight you’ll store, the material used, and the spacing of your joists. Different materials, like plywood and OSB, have distinct properties. Also, wider joist spans require thicker boards to avoid a bouncy floor, a mistake I made in my first build. Incorrectly assessing any of these aspects can lead to sagging, cracking, or the need for a complete redo.
Load Capacity Requirements
How thick does your shed floor need to be? Getting the load capacity wrong can lead to issues whenever you walk in.
Your joists carry everything. I use 2×6 or 2×8 lumber, which is rated for about 53 pounds per linear foot, when storing substantial items like lawn tractors, tool chests, or that anvil I promised to use. Avoid the thinner materials, as they might not provide enough support.
For plywood, I recommend two setups that work well:
- Double ⅝-inch layers for serious equipment (I have parked my tractor on this)
- ¾-inch tongue-and-groove, which benefits from interlocking edges
Match your joist spacing to your load; use 16 inches on center for heavy storage, as 24 inches will not suffice. Always double-check plywood ratings, as not all can handle weight equally. Also, consider whether you’re building up or pouring down, as we will discuss concrete slab options later.
OSB is inexpensive upfront, but I have seen it fail under moisture and weight. Learn from my experiences.
Material Type Considerations
Once you’ve sorted out your joist spacing and load calculations, it’s time to select the material for your floor.
Plywood vs. the Rest
I learned about flooring thickness through experience, installing ½” plywood in a damp climate and observing it warp. Here’s what actually works:
- Standard plywood floors require ⅝” to ¾” for everyday storage needs.
- OSB runs thinner (~⅝”) but trades moisture resistance for cost savings; avoid it if your region is humid.
- Double ⅝” plywood layers increase load capacity for tractors and heavy gear.
- ¾” tongue-and-groove interlocks for rigidity that surpasses square-edge alternatives.
Concrete is a robust option; use 4″ as standard, or 6–8″ for serious weight. I overbuilt my first shed floor and found it beneficial.
Joist Spacing Impact
Why does joist spacing matter so much? Get it wrong, and your plywood flooring will sag, crack, or worse. Most of us building sheds stick with 16″ on center spacing using 2×6 or 2×8 joists, which handles about 53 pounds per linear foot. That’s sufficient for garden tools and seasonal storage, but load distribution changes everything when you’re stashing heavier gear.
Through trial and error, I’ve learned the following:
- Tightened joist spacing (12″ on center) allows for thinner plywood flooring while still avoiding bounce.
- Joist hangers at every connection point prevent twisting and keep your frame square over time.
- Heavier loads require ¾” tongue-and-groove plywood or double 5/8″ layers, especially with standard 16″ spacing.
A solid foundation is essential. Building on uneven ground can lead to joist shifting within a season. Level concrete, gravel, or pressure-treated runners keep everything stable, ensuring your floor remains flat for years.
How Far Apart Should Shed Floor Joists Be?
When you’re looking at a stack of lumber and trying to figure out where to start, joist spacing can be confusing. I’ve learned how to get it right.
Standard Spacing for Most Sheds
For typical storage, I space my joists 24 inches on center. When storing heavier equipment, such as riding mowers or tool collections, I reduce the joist spacing to 16 inches and upgrade to 2x8s. That floor framing can handle about 53 pounds per linear foot, which meets most needs without overbuilding.
Load Rating Matters
Heavier loads require closer spacing and sturdier lumber. I’ve seen 2x6s sag under excessive weight, so I align my load rating with what I’m actually storing, rather than what I might store in the future.
Pro Tips for Solid Results
- Mark rim boards first for even distribution.
- Check for level constantly; twists can create problems later.
- Skip joist hangers if runners support your ends.
A level floor begins with reliable spacing.
7 Floor Coverings to Protect Your Shed Flooring
What happens when you’ve built a solid shed floor, only to watch it get damaged by heavy equipment, moisture, and years of neglect? A good floor covering can prevent that disappointment.
Here’s what works for protecting your shed flooring:
- Interlocking rubber or vinyl tiles: these lock together without glue, resist moisture, and handle heavy traffic.
- Horse stall mats: thick, non-slip cushioning that performs well in damp climates (no adhesive needed).
- Linoleum sheets: budget-friendly lining that’s easy to wipe clean, though it may scratch under serious weight.
One lesson learned is that even the best covering requires a dry subfloor. If moisture gets trapped underneath, mold can develop. I check my base annually, and this practice is essential.
How to Waterproof Shed Floors: Sealing to Ventilation
How does water infiltrate a shed floor and damage everything you’ve built? Waterproofing begins with effective sealants and concludes with proper ventilation; neglect either aspect invites problems.
| Waterproofing Step | What I Use | Why It Matters |
|---|---|---|
| Seal concrete/plywood | Penetrating sealers, epoxy coatings | Blocks moisture infiltration, stops mold |
| Cover with vinyl/linoleum | Quality sheet goods with edge sealant | Adds water resistance, needs dry subfloor |
| Protect OSB edges | Waterproof underlayment, edge sealers | Prevents swelling, extends floor life |
| Ventilate underneath | Elevated foundation, air gaps | Completes moisture control, protects your work |
I once overlooked ventilation under my shed. I now elevate every build, apply sealants to clean, dry surfaces, and pay attention to temperature for epoxy. Double-checking edge sealing is also essential. This combination keeps your floor stable for years.