

I’ve found five effective ways to install a shade sail without using posts.
First, clamp systems like Rail-EZ grip deck railings allow you to set up seasonal shade in just a few minutes.
Second, you can mount directly to load-bearing walls using eye bolts or brackets; just ensure you verify your wall material first.
Third, healthy trees are suitable anchor points when you use wide straps and bark padding to prevent damage.
Fourth, consider combining methods—such as using a wall, a tree, and a railing—to cover odd-shaped spaces.
Fifth, existing structures like pergolas or sturdy fences can serve as anchor points.
Measure your spans carefully, aiming for 12 to 15 feet between anchors, and check for cracks in your anchoring points twice a year to avoid unnecessary expenses.
Understanding the specifics of each method will help keep your sail tight and maintain good relations with your landlord.
Check Your Space: Can You Install a Shade Sail Without Posts?
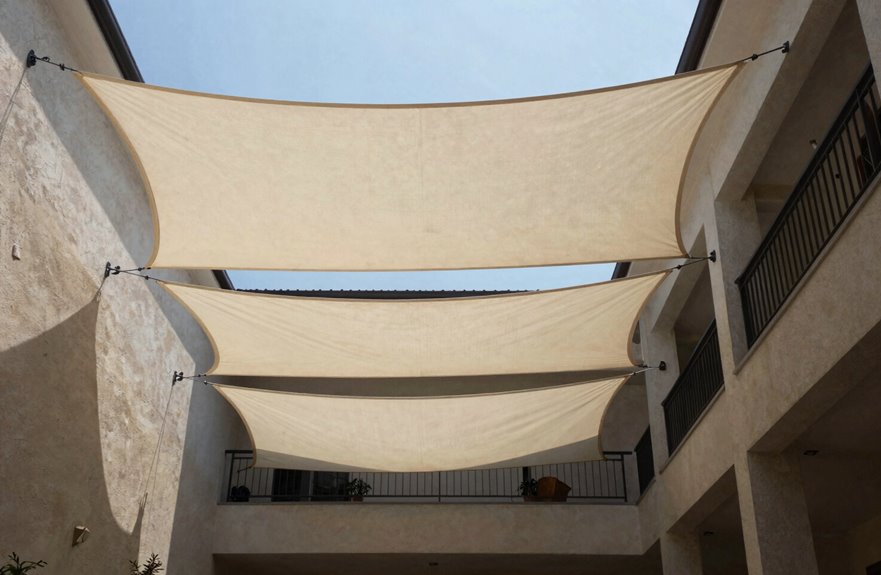
Why do we assume we need four posts in the ground? I made that mistake my first time too. Shade sail installation doesn’t always require starting from scratch.
We don’t need four posts in the ground. Shade sail installation doesn’t always require starting from scratch.
Look around your space first. You likely have more support than you realize.
What You’re Working With
- Check your walls. A wall-mounted setup uses brackets or eye bolts on sturdy exterior walls, and I’ve seen this handle 200+ square feet easily.
- Scan for existing structures, such as pergolas, gazebos, or sturdy fence lines. These distribute tension well without new concrete.
- Consider hybrid options. I anchored two corners to my garage wall, one to a mature oak (with tree-friendly hardware—check tension monthly), and used a single lightweight post for the fourth point.
Measure your spans carefully. Most residential sails need anchor points every 12-15 feet maximum.
Clamp to Deck Railings for a Seasonal, No-Drill Setup
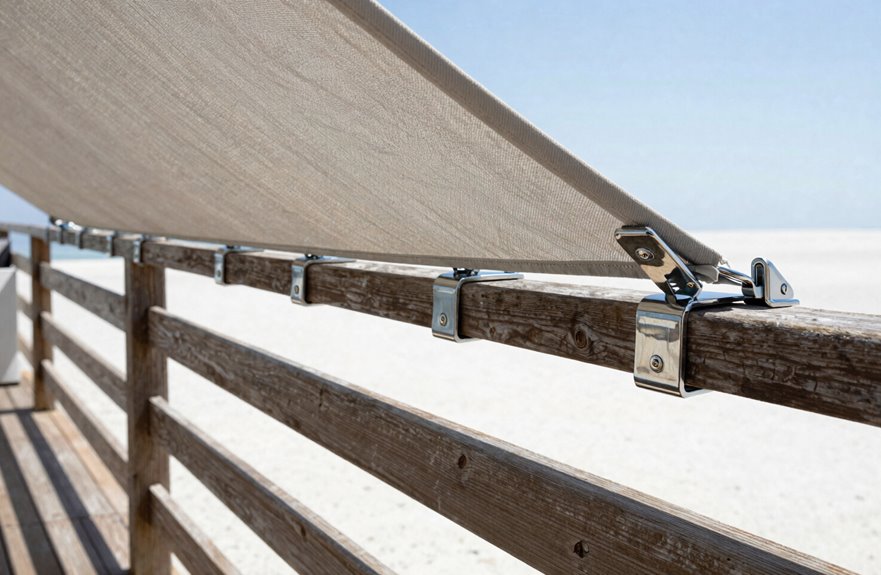
How do you shade a deck when you can’t drill into anything? The answer is Rail-EZ, a clamp system that grips your deck railing without requiring any holes.
Why This Works for Renters and Seasonal Users
This seasonal setup allows for shade from May through September, and everything can be packed away before winter. This approach avoids landlord complaints and doesn’t involve permanent changes.
What You’ll Need
- Rail-EZ clamps (movable units with tension knobs)
- Poles 1.5 inches in diameter or smaller (I use 10-foot chain link fence top rails)
- Optional bottom brackets for extra stability
My Simple Process
I clamp the Rail-EZ units to my deck railing, adjusting the spacing until the tension feels appropriate. I attach rope to each sail corner, leaving about one foot between the anchor and sail for a clean, taut look. The entire setup can be taken down in minutes when I’m finished.
Mount to Load-Bearing Walls and Solid Structures
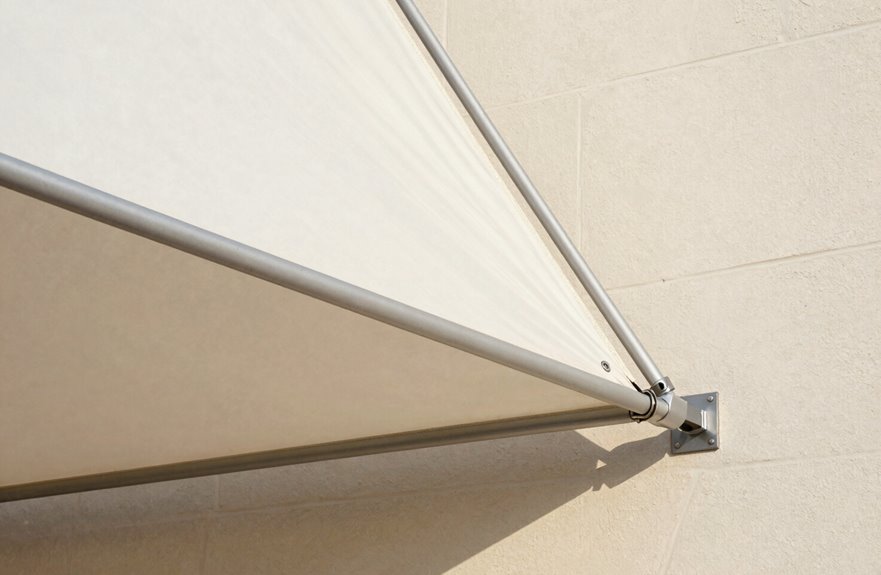
Rail-EZ clamps are effective for temporary setups, but if you prefer a more permanent solution without sinking posts in concrete, load-bearing walls are ideal for clean shade sail installations.
Finding Your Anchor Points
First, I verify that the wall can support the setup. Not every wall is suitable; I look for solid masonry, concrete, or properly framed structures that can withstand wind uplift. Brackets, eye bolts, or wall plates serve as anchor points, spaced to align with the corners of the sail and allowing for tension adjustment.
What I Learned the Hard Way
I once neglected to check wall integrity and watched my setup pull free during a storm. Now, I conduct regular inspections for anchor wear, surface cracks, and rope clearance at the cleat. Utilizing existing vertical surfaces significantly reduces costs, but it requires ongoing maintenance of the installation.
Tie Off to Healthy Trees Without Damaging Bark
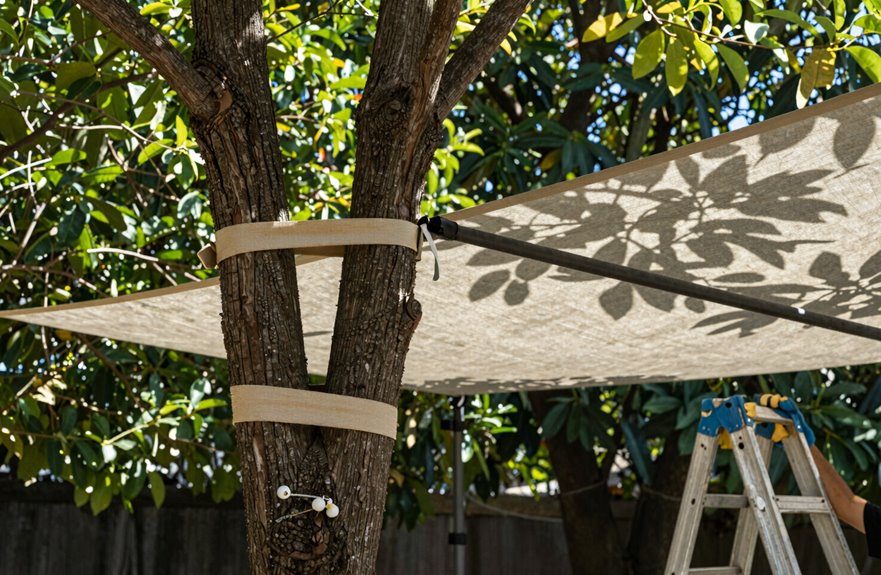
Three solid trees can replace an entire post setup if done correctly, and protecting the bark is crucial. I used to tighten straps without consideration, until a neighbor pointed out cracked bark on their oak. Now, I always use tree-friendly hardware, such as wide straps that distribute the load instead of digging in.
| Approach | Why It Works |
|---|---|
| Flexible straps with padding | Distributes pressure, prevents girdling |
| Opposite-side anchor points | Balances tension, reduces bark wear |
| Seasonal tension adjustment | Accommodates growth without damage |
I check my setup twice a year, loosening before spring growth. For bark protection, I add old garden hose as padding where straps touch the trunk. Watch for stress signs like slow leafing or cracked bark, and don’t hesitate to relocate. Taking these steps will promote healthier trees.
Mix Attachment Methods for Larger or Irregular Areas
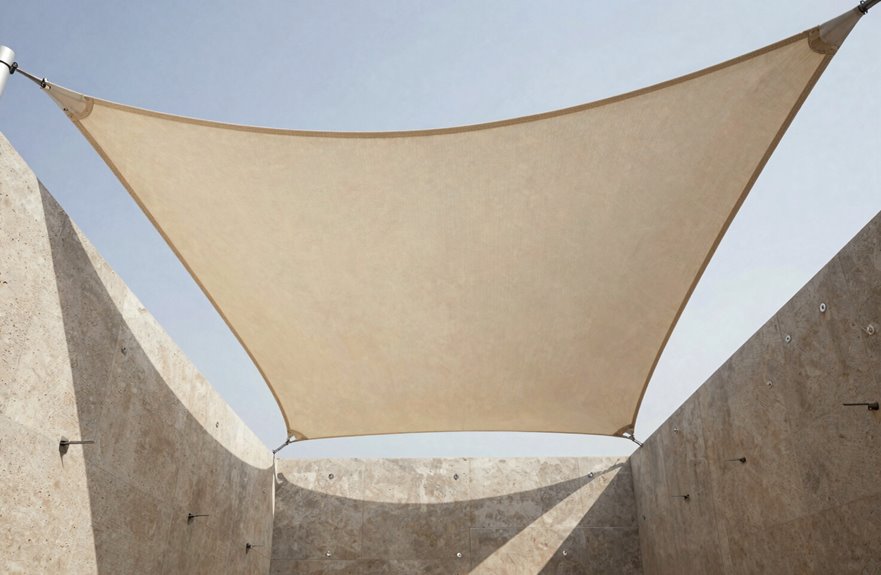
When my first shade sail project outgrew my yard’s three-tree triangle, I learned that sticking to one attachment method can create more problems than it solves.
Why Hybrid Works
A hybrid installation allows you to cover awkward spaces by utilizing a mix of trees, walls, and strategic posts. I combined wall anchors on my garage with two rail-EZ poles along the driveway, which provided even, taut coverage for my lopsided patio.
My Go-To Approach
- Map your perimeter corners first.
- Place poles where you need them, usually 8-10 feet apart.
- Fill gaps with wall anchors or sturdy tree connections.
Spreading tension across multiple points prevents any single fastener from bearing too much stress. This ensures your shade sail remains flat and avoids sagging.